Getting Started with Composting
Compost is the best thing you can add to any garden soil every day. In heavy Ozark clay it opens up tight soil so water drains and roots can breathe, in sandy soil it holds moisture and nutrients, and in every soil it feeds the earthworms, fungi and bacteria that keep the ground alive. Making it takes no fancy equipment: leaves, kitchen scraps and garden trimmings, with a little air and water, break down on their own, and here in Southwest Missouri (Zones 6b–7a) every fall hands you a free pile of leaves to start with.
Browns and greens
Good compost comes down to balancing two kinds of ingredients. Browns are high in carbon: they’re dry and give the pile structure and air pockets. Greens are high in nitrogen: they’re moist and feed the microbes that do the work. Use about 2–3 parts browns to 1 part greens, by volume.
- Browns: dry fall leaves, straw (not hay), shredded cardboard and plain paper, newspaper with black ink only, wood chips and sawdust from untreated wood, pine needles in moderation, and corn stalks and dried plant stems.
- Greens: fruit and vegetable scraps, fresh grass clippings, coffee grounds and filters, tea leaves and plain tea bags, fresh garden trimmings and spent plants, manure from rabbits, chickens, goats, cows or horses, and weeds that haven’t gone to seed.
Crushed eggshells, hair, fur and dryer lint from natural fabrics can go in too, and wood ash in small amounts.
Bag up your leaves in October and November and keep them beside the bin. Then, all through the next year, cover each bucket of kitchen scraps with a scoop of leaves. That one habit keeps the pile balanced, keeps fruit flies away and keeps the smell down.
What to keep out
- Meat, fish, bones, dairy, oils and greasy foods, which attract pests and smell
- Dog, cat and human waste, which can carry parasites and harmful bacteria
- Diseased or pest-infested plants, unless your pile reliably runs hot
- Weeds that have gone to seed, and spreading roots like bermudagrass and bindweed
- Black walnut leaves, hulls and wood, which contain a compound that harms many garden plants
- Treated, painted or stained wood and its sawdust
- Glossy or coated paper, plastic of any kind (including “compostable” plastics, unless your pile is designed for them) and charcoal briquette ash
Be careful with hay, straw, manure and grass clippings from elsewhere. Some weed killers used on hay fields and pastures survive both the animal and the compost pile, and can stunt and twist tomatoes, beans, peppers and potatoes for a year or more. Ask the source whether any herbicides were used.
Hot or cold composting
Both work. The difference is effort and speed.
- Hot composting: build a big pile all at once and turn it every 1–2 weeks. The center heats to 130–160°F, and the compost is done in about 2–4 months. A pile that stays above 131°F for several days also kills weed seeds and many plant diseases.
- Cold composting: add materials as you have them and let nature take its time. It’s very little work, but finished compost takes about 6 months to 2 years, and it won’t kill weed seeds or diseases.
Most people start with a cold pile and switch to hot once they have more material. A hot pile needs mass to hold its heat: at least 3 feet wide, deep and tall.
Choosing a bin or pile
The best system is the one you’ll actually use. Put it on level, well-drained ground close to the kitchen and garden. Partial shade keeps it from drying out in our summer heat.
- Open pile: free and simple for big yards, but it can look messy and attract critters.
- Wire or pallet bin: free or close to it, with good airflow; the right choice for most backyards. Four wooden shipping pallets wired at the corners make a sturdy bin. Use pallets stamped HT (heat treated), never MB (methyl bromide).
- Three-bin system: one bin filling, one cooking and one finishing, which makes steady hot composting easy.
- Tumbler: easy to turn and critter-resistant, good for small yards, but it holds less and can dry out or get soggy.
- Enclosed plastic bin: neat for town lots, but hard to turn, so it usually composts cold.
You can also compost right where you’ll plant. A lasagna bed is cardboard topped with alternating layers of browns and greens 12–18 inches deep, built in fall for spring planting. Sheet mulching is quicker: cardboard laid over grass, soaked, and covered with 4–6 inches of compost and mulch, ready for transplants right away.
Building a hot pile
- Gather enough material for a pile at least 3 feet in every direction.
- Start with 4–6 inches of sticks, corn stalks or straw so air can move up into the pile.
- Layer a few inches of browns, then a thinner layer of greens, and repeat. Chop or shred large pieces; they break down much faster.
- Water as you build. Each layer should feel like a wrung-out sponge.
- Add a shovel of garden soil or finished compost to bring in microbes.
- Cap it with leaves or straw to keep odors down and flies away.
- Within a few days, the center should reach 130°F or more. When the temperature starts to drop, usually every 1–2 weeks, turn the pile, moving the outside material to the center.
- When it no longer heats up after turning, let it sit another 3–4 weeks before you use it.
Fixing problems
Almost every problem comes back to the balance of browns, greens, air and water.
- Smells like rotten eggs, garbage or ammonia: too wet, too many greens or not enough air. Turn it and mix in dry leaves, straw or shredded cardboard.
- Slimy or soggy: too much water. Turn it, add browns, and cover the pile in heavy rain.
- Dry, with nothing happening, or full of ants: not enough water. Water it while you turn it.
- Damp but won’t heat up: not enough greens, or the pile is too small. Add fresh greens or manure, and build it to at least 3 feet.
- Fruit flies or critters digging: food left on top, or meat, dairy or oily food in the pile. Take those foods out, bury scraps in the center under browns, and use a closed bin or hardware cloth if animals keep at it.
Through the seasons
Our summers can bake a pile dry in a week, especially in July and August, so check the moisture more often in a heat wave. In a wet spring, a loose cover keeps heavy rain out. Winter slows everything down, but a large pile keeps working longer, and straw bales stacked around it help hold in the heat. Keep adding scraps through the cold months, covered with leaves, and the pile picks back up in spring.
Worm bins and leaf mold
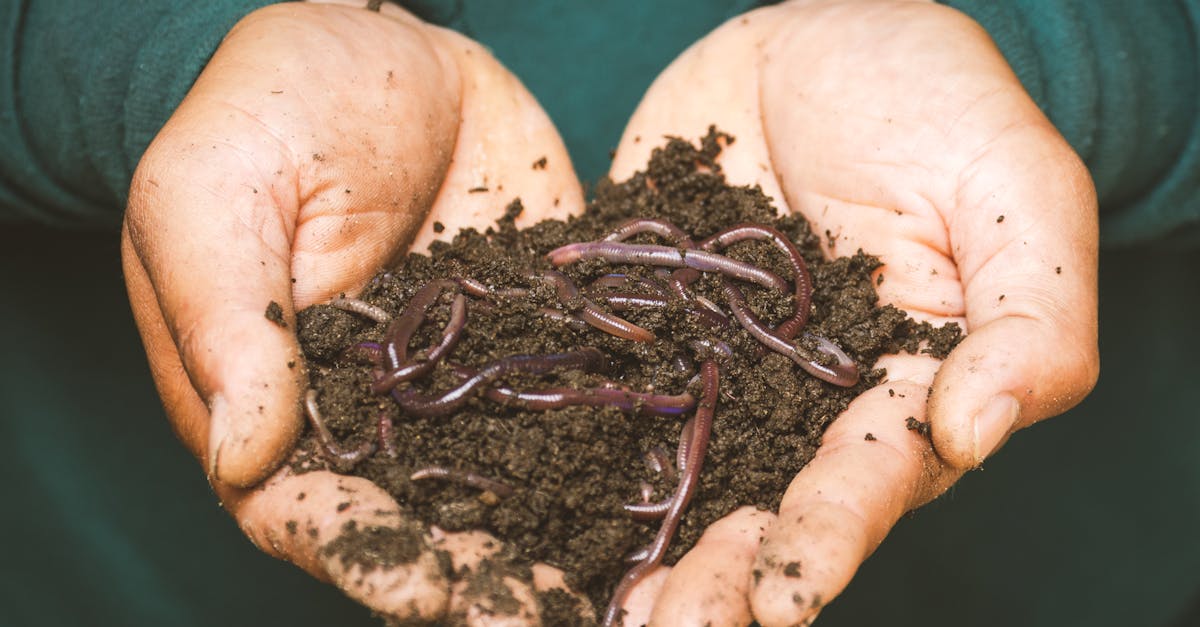
A worm bin turns kitchen scraps into worm castings, one of the richest soil amendments there is, and keeps working indoors all winter. Use red wigglers, not earthworms dug from the garden, and start with about 1 pound in a plastic tote with air holes, drainage holes and moist shredded paper for bedding. Bury chopped scraps under the bedding, skipping citrus, onions, garlic, spicy foods, meat and dairy, and keep the bin between 55 and 77°F.
Leaf mold is simply leaves left to break down on their own, packed wet into a wire ring or into black trash bags with a few holes poked in them. It adds few nutrients but improves soil structure and makes a fine mulch. Run the mower over the leaves first: shredded leaves are ready in about 6–12 months, twice as fast as whole ones.
When it’s ready
Finished compost is dark brown to black, crumbly, and smells like a forest floor after rain. You shouldn’t recognize most of what went in. If it still feels warm or smells sour, give it more time: unfinished compost can tie up nitrogen in the soil and stunt young plants.
Using compost
- New beds: work 2–4 inches into the top several inches of soil.
- Established beds: spread 1–2 inches on top each spring or fall and let the worms pull it in.
- Side-dressing: scatter a handful around heavy feeders like tomatoes, squash and corn midseason.
- Fruit trees and perennials: spread a ring under the drip line, a few inches away from trunks and stems.
- Potting mix: blend 1 part sifted compost with 2–3 parts potting mix.